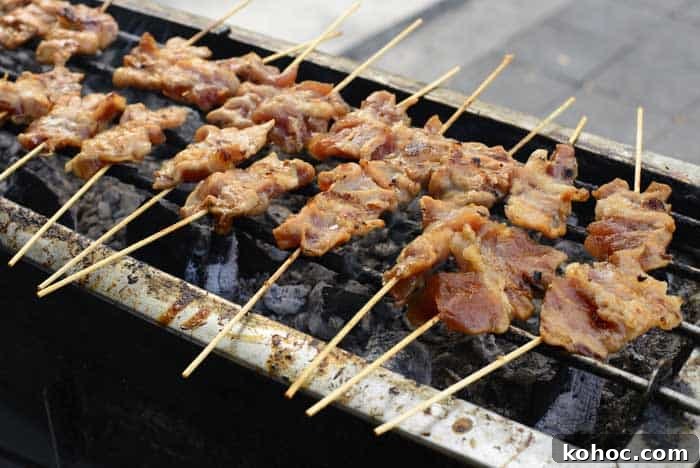
Want to bring the fun of Japanese yakitori grilling to your home with your own DIY yakitori grill project? This guide covers everything you need to plan, build, and use a compact yakitori grill suitable for small patios, balconies, or even indoor counter use when safe ventilation and precautions are observed.

- What is Yakitori grilling?
- How to make your own Yakitori grill
- How to make a wood panel Yakitori grill
- How to make an outdoor brick Yakitori grill
- How to use your brick Yakitori grill
Yakitori grilling produces perfect finger food and appetizers with a communal, interactive cooking style. Although the word “yakitori” literally translates to “grilled chicken,” the method accommodates a wide variety of meats, seafood, and vegetables. Traditional yakitori grills are narrow rectangular boxes—often clay—designed to hold thin skewers placed above charcoal so ingredients cook evenly without sitting directly on hot grates.
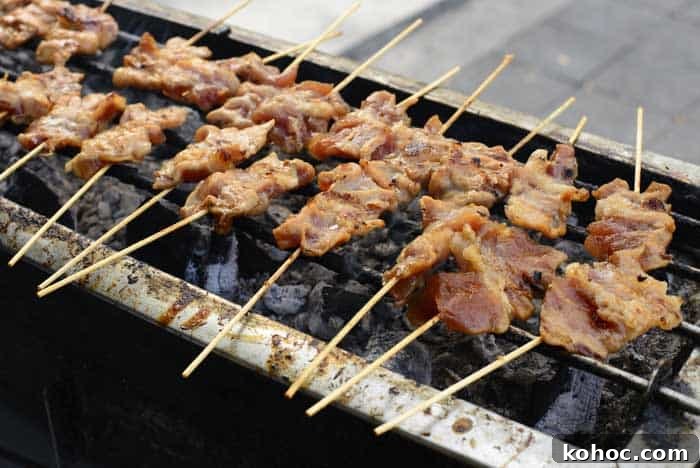
Compact yakitori grills are ideal for social gatherings because each guest can grill and finish skewers to personal preference. They are typically only a few feet long and just a few inches wide, enabling quick cooking with focused heat. Because these grills are small and designed for skewers, they are portable, use minimal charcoal, and create an engaging table-side cooking experience.
What is Yakitori grilling?
Yakitori grilling is similar to other communal grilling traditions like Korean barbecue in spirit: cooking together and eating as you go. What distinguishes yakitori is the reliance on skewers and the small, narrow grill platform that concentrates heat under each skewer. You can use this method with chicken, pork, beef, mushrooms, scallions, peppers, and many other ingredients, often brushed with tare (a savory-sweet glaze) or simply seasoned with salt.
How to make your own Yakitori grill
While store-bought yakitori grills are available at various price points, building your own lets you customize size and materials while keeping costs down. Below are two approachable builds: a portable wood-panel style that can be used atop countertops or small tables, and a more permanent outdoor brick version for patios. Both designs prioritize safety, ventilation, and maintaining a heat-resistant surface for charcoal.
How to make a wood panel Yakitori grill
This compact, semi-portable option uses a metal hotel pan as the firebox core and a wooden surround to create a neat aesthetic that fits on a kitchen or dining counter for social grilling (use outdoors or in well-ventilated areas only). Materials and steps:
- Metal hotel pan (stainless steel or heavy-gauge steel), rectangular and 4–6 inches deep.
- Brick paver or other heatproof base to set the pan on.
- Pine board cut to form a wooden surround frame for the pan.
- Aluminum foil tape and fiberglass or mineral wool insulation to line the inside of the wooden surround to protect against heat.
- Decorative corner fittings or fasteners to finish the surround.
Place the hotel pan on the heatproof paver, build a wooden surround to fit the pan, and line the inner faces with foil-backed insulation secured with high-temperature tape. The insulation helps protect the wood while maintaining the compact look. Leave openings or ventilation gaps at the ends so charcoal breathes. Fit skewers across the top so they span the pan without tipping into the coals.
How to make an outdoor brick Yakitori grill
The brick version is simple, rugged, and well suited to patios. It uses common masonry materials to create a raised, narrow cooking channel for skewers. Basic materials and approach:
- Wood boards or planks to build a low platform (about 12 inches high).
- Stone or brick pavers sized to create the central coal bed.
- Standard brick to form the perimeter walls and skewer supports.
Construct a sturdy wooden platform at roughly knee height so the grill is comfortable to use. Lay one or two long pavers in the center as the base for charcoal. Surround the pavers with bricks set on edge to create the channel walls. Add a second inner row of bricks if you want to raise skewer positions or create multiple heat zones. Make sure the final width allows skewers to sit across the top without dropping into the coals.
How to use your brick Yakitori grill
Light charcoal in a chimney starter and allow it to be well-lit until most briquettes are gray on the surface. Pour embers into the paver-lined base and let them settle until they are hot embers rather than open flames. Position skewers across the brick edges so meat sits above the heat. To protect wooden or bamboo skewers from burning, line the top edge of the bricks with a strip of aluminum foil or soak wooden skewers in water for at least 30 minutes before use.
Create two heat zones by piling coals slightly thicker on one side for high-heat searing and finishing, and keeping the other side lower for gentle cooking. Add small pieces of smoking wood—such as hickory, apple, or cherry—in moderation to introduce subtle smoke flavor without overpowering the delicate yakitori style. Turn skewers frequently for even char and brush with tare or oil during the last minutes of cooking to develop a glossy finish.
With a compact yakitori grill—whether a lined hotel pan inside a wooden surround or a simple brick channel—you can recreate the interactive, shareable experience of Japanese yakitori at home. Safety first: always use heatproof surfaces, maintain good ventilation, and keep a fire extinguisher or water source nearby when cooking with charcoal.